Hobie sell a battery cradle that fits inside the hatch and therefore no need to drill the hatch.
Gazza
l2andom's Revo13+AI-Updated whenever new things come along!
-
l2andom

- Square eyes
- Posts: 628
- Joined: 12 Feb 2013, 17:58
- kayak: Adventure Island, WildySys T140, Outback
- Real Name: Michael
- Location: Merimbula, NSW
Re: l2andom's Revo 13 - Updated whenever new things come alo
I have the battery holder (I had it in the front of the yak originally for the big Remco battery), but wanted something to cover my battery completely from any chance of water. And the plastic box fits the ZippyMax battery nice and snug as well so I went that route. No issues so far, and no water either. Also a lot less lighter than the RemcoGazza wrote:Hobie sell a battery cradle that fits inside the hatch and therefore no need to drill the hatch.
Gazza
When I think about it I could probably have just put the battery into a dry bag and then strapped it onto the battery cradle to save from drilling, but this way has worked for me quite well.
-
l2andom
- Square eyes
- Posts: 628
- Joined: 12 Feb 2013, 17:58
- kayak: Adventure Island, WildySys T140, Outback
- Real Name: Michael
- Location: Merimbula, NSW
Re: l2andom's Revo13+AI-Updated whenever new things come alo
Did a "No Drill" anchor trolley that is easily removable onto my AI. Got a bit of advice/info/help from Deefa and went along with it. There was only part that I drilled and that was not the kayak itself, it was the screw-in Padeye that replaced the original bungee holder thingy. I only ever anchor or deploy a drift chute to the rear, so the trolley does not run all the way up to the front as most would.
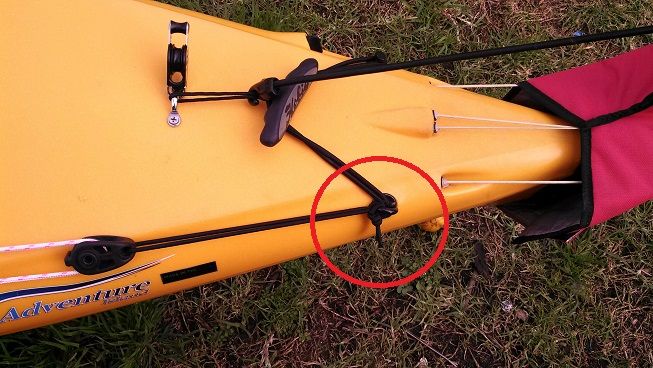
Circled is the screw in padeye that I was talking about.
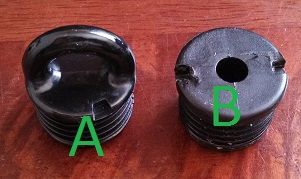
A is the screw in padeye, B is what was previously there. This is where the drilling took place, I actually drilled a hole into the middle of the padeye of approximately the same size and then fed the bungee back through so it essentially worked the same. Will this affect it's strength? Probably, but it felt pretty strong still and we'll see how long it'll hold up. I very rarely anchor up, so I don't see it causing any issues.
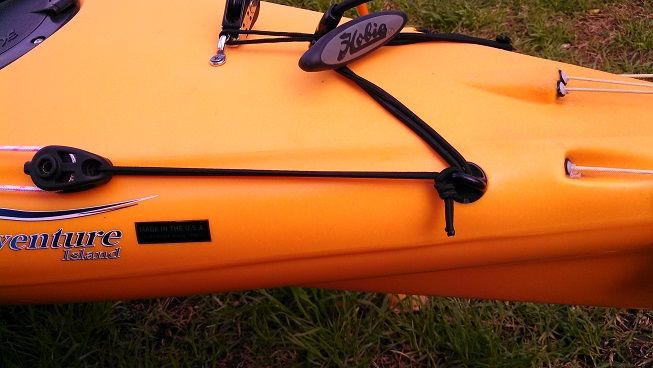
Up close

The front. The ring is actually held in place by 2 zipties.
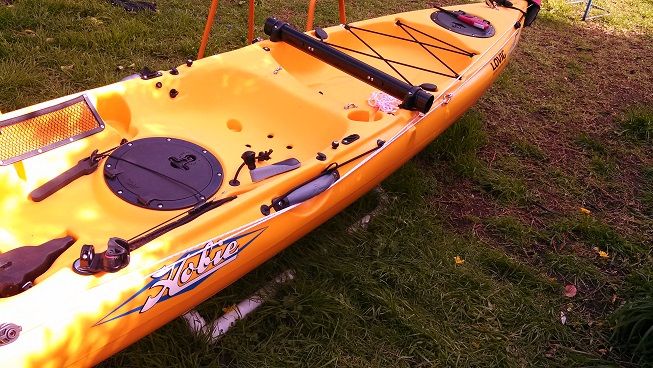
And the finished product.
The front and rear pulley's are both tied down utilizing bungee so I disregarded using bungee in the section that holds the snaphook where my anchor or drift chute line would go through. There is also another stainless ring underneath the rear aka fixed down with zipties as well, it's placed there to help keep the line somewhat in order. Probably not the most clever of ideas or the prettiest but it works, and this is what I somewhat had in mind when Deefa was explaining his set up. Works great for me and best part is no holes into the yak, and thanks Deefa for the help.
Circled is the screw in padeye that I was talking about.
A is the screw in padeye, B is what was previously there. This is where the drilling took place, I actually drilled a hole into the middle of the padeye of approximately the same size and then fed the bungee back through so it essentially worked the same. Will this affect it's strength? Probably, but it felt pretty strong still and we'll see how long it'll hold up. I very rarely anchor up, so I don't see it causing any issues.
Up close
The front. The ring is actually held in place by 2 zipties.
And the finished product.
The front and rear pulley's are both tied down utilizing bungee so I disregarded using bungee in the section that holds the snaphook where my anchor or drift chute line would go through. There is also another stainless ring underneath the rear aka fixed down with zipties as well, it's placed there to help keep the line somewhat in order. Probably not the most clever of ideas or the prettiest but it works, and this is what I somewhat had in mind when Deefa was explaining his set up. Works great for me and best part is no holes into the yak, and thanks Deefa for the help.